Tuesday, November 11, 2014

Try it on Tuesday - Home-made or Handmade

Hello Everyone!

It's time for another fantastic challenge over at TRY IT ON TUESDAY. Thank you so much to everyone who joined us for our 'Colours of Autumn' challenge, there were so many gorgeous entries, it was very difficult to choose!

Our challenge for the next two weeks is HOME-MADE OR HANDMADE (gift, decoration, etc). You should hop on over there and see the wonderful creations that my talented teamies made! Here is my make.
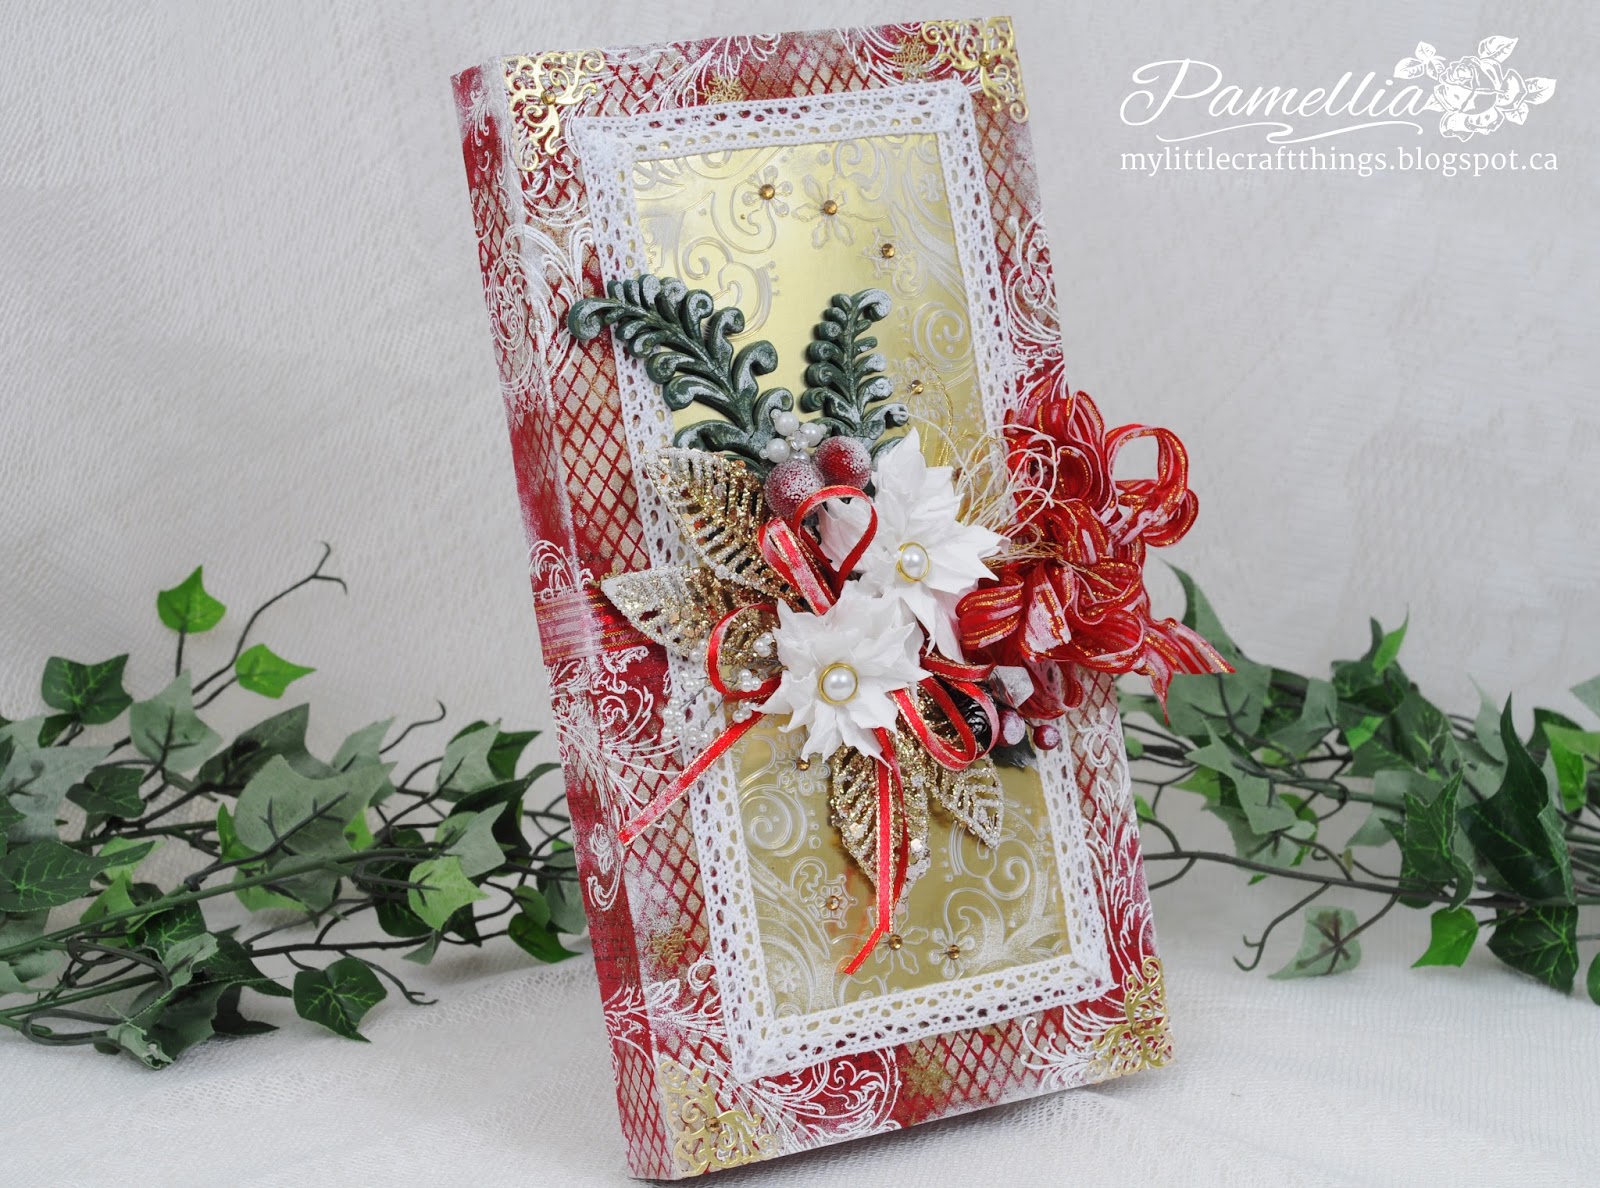

This is a gift for my Mom, she is coming for a visit on the 24th and with Christmas just around the corner, I thought I would make her something that she could use come the holiday season. She is very traditional with her colours and her style at Christmas time, so I thought I would go with the standard red and green. I added the gold because my Mom is an elegant lady and I added the shabby touches because, well, that's me...and my Mom is OK with that!!


A quick tutorial on how I did the base of the box, then I will show you some more images. I started with a pizza box, that's right MRS DUCK, another pizza box! What can I say, I like pizza! Anyway, I painted the box with DecoArt Crafter's Acrylic Deep Red paint on both sides.


I used Ranger Archival ink Potting Soil and a Christmas Carol stamp to put down a little bit of design. Then I used some DecoArt White paint and the Diamond stencil from Memory Box to add more design.


BUMPED STENCIL TECHNIQUE (thanks Chris): I carefully placed the stencil back down and offset it about a couple of millimetres (or BUMPED it) and then went over the pattern again with DecoArt Spun Gold paint. This is a really amazing technique because sometimes the pattern looks white and sometimes it looks gold depending on how the light hits it...very cool!

I used Tim Holtz's Flourish stamp and white embossing powder to add some more design.


Lastly, a couple of snowflakes stamps here and there using gold embossing powder. That's it, easy stuff.


The front panel of the box is two layers. The bottom layer is gold mirror paper and the top layer is acetate which I ran through my Cuttlebug with a Cuttlebug embossing folder.


The poinsettias were made with the Tim Holtz Tattered Poinsettia die. The gold leaves were cut from a sprig and I added some chunky glitter to them. The Filigree corner die is from La La Lands.

The green fern looking leaves were made from coloured crafter's clay...a product that I will NEVER use again!! It's horrible crap, the dye from the clay was everywhere, on my hands, on the mold, EVERYWHERE!! I will stick to white clay from now on and paint it, like I usually do. The entire container of coloured clay...straight in the garbage can, where it belongs!


The texture on the leaves was done using Rock Candy Crackle Paint and then I added some gold paint into the cracks and white paint to the surface, looks so much nicer in real life. sad face


On the inside is the box that houses the candle sets that I purchased. I left the inside cover blank for now. That is where I will attach the matching card or tag , whenever I can find the time to make it. lol

The box opens at the top, so the candles can easily be removed without destroying the pretty packaging.


I am entering my card into the following wonderful challenges:

(They are asking that you make a little something for someone and make their day)

- Inkspirational Challenges - #69 - Word Prompt - Shine


That's it for today. Thank you for stopping in and for all the amazing comments. I read and appreciate every single one! If you have any questions, please let me know.


Monday, November 10, 2014

Crafty Cardmakers #127 - A Touch of Charm

Hello Everyone!

It's time for another challenge over at Crafty Cardmakers and More! Thank you to everyone who shared projects with us for our 'Cut It Out" challenge, a record number of entries since I've been there, over 250!

Josephine, our wonderful hostess has chosen the following theme for us CHALLENGE #127 - A TOUCH OF CHARM. So she would like to see a charm added to your project. Here is my make (in case you are wondering...yes it's the card from my new blog banner).


For the background, I painted a piece of white card stock with 2 different colours of DecoArt paints - Tropical Blue and Turquoise, then I ran it through my Cuttlebug using a snowflake embossing folder, but I put the paper in paint side down so that the snowflakes would be indented instead of raised.

I took my sanding block and rubbed off some of the paint in various areas, then I took my Tim Holtz distress ink pads Peacock Feathers, Peeled Paint and Crushed Olive and rubbed them very lightly over the surface.


The pine branches were done with a Cheery Lynn Cutie Fringe die. The script stamp is from BoBunny.


The charm is my favourite bit on this card. I had originally picked out a snowflake charm to use, but in the end, I wasn't happy with the way it looked, so I decided to try and make my own charm using a Lili of the Valley stamp.

I had a happy accident and created a new technique. I'm not saying it's new to the whole world...just to me - and hopefully to some of you. This charm actually started out as a white tag cut from the Tim Holtz Tiny Tag and Tabs, if you can believe that! I have decided I'm going to play with the technique a bit and then do a tutorial because I think there is potential with this one. Stay tuned for more on my 'Distressed Metal Technique'.


If you have a minute, really zoom in on the texture of my charm and see how fun it is! To view super-sized images, right click on any image and then click 'open link in new tab'.


I am entering my card into the following wonderful challenges:


That's it for today. Thank you for stopping in and for all the amazing comments. I read and appreciate every single one! If you have any questions, please let me know.


Thursday, November 6, 2014

Happy Birthday Maja

Hello Everyone!

I'm back with some more birthday cards today. I would like to say thank you to everyone for all of the wonderful birthday wishes, both here on my blog and by email. It was just so nice to hear from everyone!

This first card is one that I made for my bloggy friend Maja, you probably know her as Cebelica. It has safely arrived to her, so it's ok to show you now. I have never had the honour of meeting Maja in person, but through blogs and emails, I have come to know her as a sweet, smart, funny and super talented young lady. You can find her gorgeous creations at My Little World.


The background was made with a variety of DecoArt paints and Crackle texture paste and a Prima Flourish Damask stencil to add the design.

The flowers were made from a poinsettia die and coloured with Tim Holtz Bundled Sage. The butterfly and corner piece were made from crafter's clay and Martha Stewart molds.

The frame die is from Spellbinders Radiant Rectangles, the leaves are Spellbinders Create-a-Carnation, the bird stamp is from Kaisercraft and the sentiment is from Heartfelt Creations All Seasons.


***
I DID NOT MAKE THE FOLLOWING TWO CARDS

I was a super lucky girl this year!! I received two beautiful birthday cards in the mail that I was not expecting at all! My friends don't send me birthday cards any more, they say it's embarrassing to send me a store bought card...so this was a real treat for me this year!

I would like to thank Maja for sending me this gorgeous birthday card!


There are so many details in this card, I can't begin to point them all out. I can only say...zoom in and check it out. Three are pearls and stitches and doilies and pins and glitter and butterflies and and and...isn't it amazing! Her Magnolia image is coloured so beautifully, I could stare at this card for hours! Thank you so much Maya, you really put a smile on my face! :)


***
I would like to thank Kim Reygate for sending me this stunning birthday card!


Kim is one of my co-teamies over at Crafty Cardmakers and More. I was just so thrilled to open this envelope and find such a fabulous card inside! Kim is such a talented lady, I really hope you will hop on over and give her some bloggy cheer! You can find her at Kim x.

There are so many luscious layers on this card and most of them were done from scratch, just like mine!! This top layer, how I wish you could touch it! It has an amazing texture to it! Those matching buttons...I don't know how she did those, but wowsers, they are fantastic! Thank you so much Kim, you really made my day!


That's it for today. Thank you for stopping in and for all the amazing comments. I read and appreciate every single one! If you have any questions, please let me know.