Tuesday, March 31, 2015

Try it on Tuesday - They Who Have Wings

Hello Everyone!

Welcome to another challenge starting over at Try it on Tuesday. This time around our theme is another favourite of mine - THEY WHO HAVE WINGS. I can't wait to see what you come up with!

I decided I wanted to try and make a card without using a single Tim Holtz product, so this entire card was done using DecoArt paints and Copic markers. Sorry Tim, had to be done!


The background was painted with DecoArt Crafter's Acrylics Cherry Blossom, Turquoise, Lavender and Tropical Blue.  I blended them together with water and splashed a little Americana Titanium on the top.


The brick layer was done with home made texture paste and a home made brick stencil. I painted it with DecoArt Americana Acrylics Hauser Green and Avocado. I dabbed a little Titanium White on the top.


I coloured the ribbon with DecoArt paints as well. The butterfly is made from crafter's clay and a Martha Stewart mold. I painted it green and highlighted it with white paint.


The border vine stamp is from Kaisercraft and so are the butterflies. The script stamp is from BoBunny. All the stamping was done with Ranger Archival ink Jet Black. The butterflies were coloured with Copic markers. The two back layers were coloured using watered down versions of the same colours of paints.


 The flowers are made of two stamps from the LaBlanche Rosebuds set. I masked and stamped them several times to create a bouquet. I coloured the flowers with a white pencil crayon, and touched them up with Titanium White and Avocado paints.


I am entering my DecoArt card into the following wonderful challenges:

(this time of year, my butterfly stamps get used more than anything else - and this one is my favourite)


That's it for today. Thank you for stopping in and for all the amazing comments. I read and appreciate every single one! If you have any questions, please let me know.

Wednesday, March 25, 2015

Frilly and Funkie - Put a Ribbon on it!

Hello Everyone!

It's time for another wonderful challenge over at Frilly and Funkie! This time Linda is our lovely hostess and she has chosen the theme PUT A RIBBON ON IT. Don't forget to make to make is shabby chic or vintage style. One lucky winner will receive a $25 gift certificate to Linda's shop The Funkie Junkie Boutique! Here is my ribbon card.


The flowers are from the new Tim Holtz Flower Garden set. I stamped them with Wendy Vecchi Archival ink Potting Soil and coated it with clear embossing powder. The centers are made using Vintage Photo embossing powder and Tim Holtz Gumdrops.


For the background I spritzed with Tim Holtz Shabby Shutters, Peeled Paint and Victorian Velvet distress sprays, then applied some Wendy Vecchi texture paste with the new Tim Holtz Lace stencil...my new favourite!! Then I spritzed with Lindy's Stamp Gang Moonshadow Mist Silhouette Silver.


The frame is Tim Holtz Ornate Frame and I gave it a simple wood finish using some Gathered Twigs distress stain. The greenery is Garden Greens and coloured with Shabby Shutters and Gathered Twigs. The kraft sprigs were spritzed with Picket Fence.


I am entering the following wonderful challenges:

***

All of the following products that I used can be purchased at The Funkie Junkie Boutique


That's it for today. Thank you for stopping in and for all the amazing comments. I read and appreciate every single one! If you have any questions, please let me know.

Monday, March 23, 2015

Crafty Cardmakers and More - #135 - Spring has Sprung!

Hello Everyone!

Well, it's time for another challenge over at Crafty Cardmakers and More! This time around our lovely hostess Marlene has chosen the theme SPRING HAS SPRUNG, so she would like to see your Spring themed creations. That could be a new life (baby) either animal or human, spring flowers, soft spring colours etc.

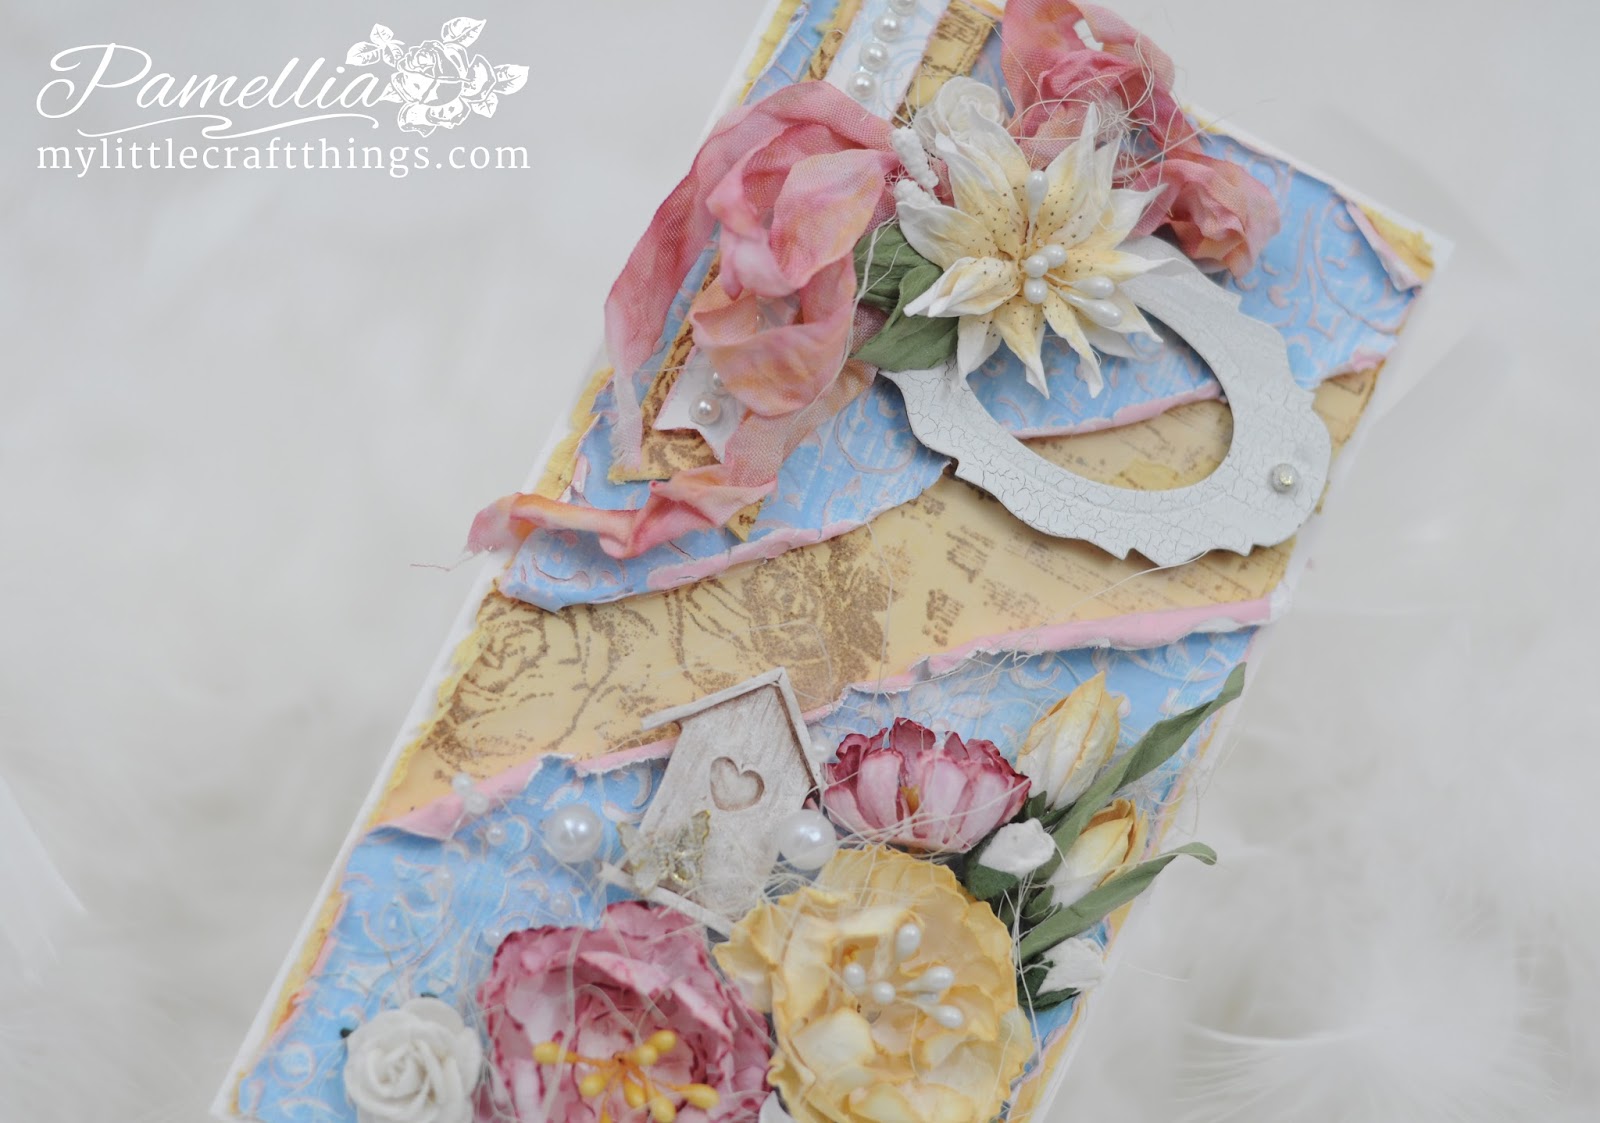
I decided to go for spring colours and spring flowers. Here is my shabby make.


I made a variety of flowers for my spring garden. The dies I used here are Spellbinders Create-a-Carnation, Poppystamps Blooming Poinsettia andSpellbinders Foliage. They were coloured using Tim Holtz distress inks Spun Sugar, Victorian Velvet, Aged Mahogany, Scattered Straw and Wild Honey.


The fishtail banners are from My Favorite Things. The roses were stamped with Ranger Archival ink Coffee and a Kaisercraft stamp from the Porcelain Rose set. The birdhouse was made using crafter's clay and a silicone mold. I antiqued it with Tim Holtz Gathered Twigs distress spray.


The ribbon was coloured with Tim Holtz Victorian Velvet, Aged Mahogany and Wild Honey. The frame was cut from Tim Holtz / Sizzix Tag and Bookplates. I antiqued the frame using DecoArt Weathered Wood Finish Crackle medium and DecoArt Crafter's Acrylic Tan and White paints.


For the background, I painted a piece of pale pink paper with a coat of DecoArt Crafter's Acrylic White and Tropical Blue paints, then I embossed it and sanded off the pattern so the paint and paper would show through.


I am entering the following wonderful challenges:


That's it for today. Thank you for stopping in and for all the amazing comments. I read and appreciate every single one! If you have any questions, please let me know.


Friday, March 20, 2015

Tim's 12 Tags of 2015 - March

Hello Everyone!

Today I'm here to share my take on Tim's 12 Tags of 2015 - March.

Yeah, I know...it doesn't look anything like a tag, and I didn't even use the right butterfly. I apologize to Tim for that, but I searched up and down for that Perspective stamp set and couldn't find one in time. I tried to make up for it by using the new Flower Garden stamp set. I hope you enjoy my Tim Holtz Flower Garden Box!


For the box, I actually followed all the steps of Tim's tag as closely as I could with the products I had on hand. I will let you get the technique details from the master himself and I will just fill you in on what I used for products.

I cut the main box using my brand new Eileen Hull die that I won for my Haunted House in October. I say brand new because this is my first time using the die, and I have to say...LOVE IT!! Thank you so much Eileen, I will be using this much more in the future! I coated the box with a layer of DecoArt Ebony paint from the Americana line before I attached my panels.


For my paint choices, I used Broken China, Salty Ocean, Mustard Seed, Cracked Pistachio, Abandoned Coral and Spun Sugar.

For my stamps, I used Urban Grunge and French Market. I stamped in the background lightly with Ranger Jet Black Archival ink instead of using the tissue tape.


I cut the number 2 from the Vintage Noel die and used several layers of UTEE and Ranger Platinum embossing powder. I added a couple Tim Holtz Idea-ology brads.


I decided to go with the Tim Holtz Flourish stencil, since it just seemed to be a perfect fit for a garden project. I used the new Ranger Liquid Pearls in Brass to highlight the butterfly wings. Love this stuff!

I used several different Ranger Alcohol inks to colour the Tim Holtz Gumdrops. Aren't they pretty.


The flowers are from the new Tim Holtz Flower Garden stamp set. I stamped them using Jet Black Archival ink and then covered them with clear embossing powder, so I could colour them without the ink running.

I used a variety of distress ink markers to colour the flowers and stems and then I fussy cut them out, gave them a curve and propped them up and made them look 3d.


The foliage is cut from the Tim Holtz Garden Greens set. I coloured them with distress sprays Peeled Paint and Shabby Shutters. I filled the base with some natural fibres and real moss to give it an outdoorsie feel!


I am entering my Tim Holtz Flower Garden Box into the following wonderful challenges:
- Pan Pastel - Challenge #6 - Alter It (I altered a Cheerios box)

***

All of the following products that I used can be purchased at The Funkie Junkie Boutique


That's it for today. Thank you for stopping in and for all the amazing comments. I read and appreciate every single one! If you have any questions, please let me know.


Tuesday, March 17, 2015

Try it on Tuesday - Hats - Steampunk meets Western

Hello Everyone!

Welcome to another challenge starting over at Try it on Tuesday. This time around our theme is a brand new on for me - HATS.

The only stamp that I had on hand involving a hat, is a masculine stamp (thanks Cec) so I decided to do another masculine project. I had so much fun doing my steampunk card last week, that I though I would do something similar. This time I threw in a bit of a Western twist with some faux leather. I hope you enjoy my Steampunk meets Western Shadow Box.


The stamp is from Tim Holtz. I fussy cut the men into 3 pieces and used foam dots to layer them. The metal frame was covered in foil and embossed using a Tim Holtz embossing folder and coloured with alcohol inks and dabbed with some Tim Holtz paints.


These wonderful gears were cut out for me by my good friend Cec. I used black, copper and gold paints and some embossing powders to give them a grungy look.


I used the new Brass Liquid Pearls to add some extra patterns on the gears, and the centers are bead spacers and bronze brads.


The frame started as a piece of kraft paper that I coloured using Gathered Twigs, Brushed Corduroy and Vintage Photo distress inks. I embossed it with a Cuttlebug embossing folder and gave it a coating of glossy Glue N Seal. The rims are just strips of paper coloured with distress inks.

In the bottom corner, I used the new Tim Holtz Mixed Media die set to cut out this pattern. I put a layer of acetate in behind it to help keep the shape.


The backing is a simple woodgrain texture with the harlequin pattern put down with texture paste which I covered with with embossing powder while it was wet. I used Ranger Copper and Queen's Gold embossing powders.


I am entering my Steampunk Shadow Box into the following wonderful challenges:


That's it for today. Thank you for stopping in and for all the amazing comments. I read and appreciate every single one! If you have any questions, please let me know.