Friday, June 5, 2015

Anything But Cute Mixed Media Challenges - #2 Make it Masculine

Hello Everybody!

I would just like to send out a huge thank you to everyone who entered our very first challenge last month. I was just so touched by the kind words you all had to say and by all the amazing work that went into every single project that was posted!! I was so excited to see some brand new faces to the mixed media world as well as some some skilled experts, such a great turn out from all levels of crafting!! Be sure to join us next Tuesday when all the winners are announced!

It's time for a new challenge and this month the wonderful and super talented Cec is the hostess and she has chosen the theme MAKE IT MASCULINE. Lots more details in a minute, but first here is my make.


For this challenge, Cec would like you to make a mixed media card or other project for a fellow in your life. It could be for Father's Day, a birthday, an anniversary or just because you want him to know how special he is.


I decided to make an altered book box for my Dad for Father's Day. My Dad is one of my biggest fans and he is always so impressed by the different textures I create, so I thought I would go all out and do some extreme textures in a 'Steampunk meets the Deeps Woods' sort of style. I went for faux tree bark, faux weathered wood, faux leather and faux antique metal, all of them very grungy and manly, I think. Inside I will place his card and gift...neither of which are actually ready yet, doh!


HOW DID I DO THAT:

- I applied a thick layer of DecoArt Gesso and then heated the heck out of it until it was all bubbly.

- next was some DecoArt Texture Sand Paste and Crackle Paste in random areas and let it dry. If you have never tried the Texture Sand, I highly recommend it! It has the most amazing texture. It's thin enough to be able to spread it over a large surface but thick enough to be able to apply it through a stencil, and it takes paint and inks amazingly without needing a primer!


- then I applied a layer of DecoArt Americana acrylic paints in two contrasting colours - Antique Gold and Oxblood. These colours work great for rusting effects or wood effects, a couple of my favs. I applied the Antique Gold first and then a little Vaseline as a resist before applying the Oxblood. Then I sponged a little of both randomly using a sea sponge.


- using the Andy Skinner texture stamp set from Stampendous, I added a little extra design, then I dribbled some Gathered Twigs distress ink spray and stain down the surface and let them sink in.

- there are a couple of finishing steps that I forgot to photograph. I took a quilling needle and began to scratch up the surface in different directions, then I rubbed some DecoArt Media Antiquing cream into the cracks. I used Raw Umber and English Red Oxide. You can see it in the close ups.


The faux leather straps were made by applying some DecoArt Modeling Paste through a piece of drywall tape to get the tiny pattern. I painted it with Americana Acrylic paints in Burnt Sienna and Dark Chocolate with splashes of Oxblood and Ebony Black. I coated it with DecoArt Matte Medium. It gives it a nice sealed appearance without being too glossy. The buckles are off an old pair of high heel shoes that I don't wear any more.


For the sides, I brushed on a layer of DecoArt Modeling Paste and then took a stippling brush and dragged it down the sides to create the illusion of pages. I heated it up to create some bubbles and then I lightly brushed on some distress ink spray to antique it a bit. They are attached with magnet strips, so they can be moved easily to open the box.


The bark is a new technique that I thought I would try using all of my new DecoArt products. I have just purchased a rig for my video camera, so I will be starting my very own YouTube channel soon, and this technique is on my list of video tutorials. STAY TUNED. lol

Unfortunately, I haven't decorated the inside yet, because I haven't made my final decision about what gift I am getting my Dad, so I'm not sure how much space there will be. I might snap a photo later if I remember.


The binding strips were cut from a pizza box (oh come on, you had to know that was coming!). I painted them with DecoArt Americana Ebony Black and a touch of Oxblood and then rubbed on some DecoArt Metallic Lustre Gold Rush Wax. The clock, key and steampunk heart were done the same way. The screws are just cardboard pieces that I indented with a credit card.


I am entering the following wonderful challenges:


That's it for today. Thank you for stopping in and for all the amazing comments. I read and appreciate every single one! If you have any questions, please let me know.


Wednesday, June 3, 2015

Frilly and Funkie - Monochromatic

Hello Everyone!

It's time for another wonderful challenge over at Frilly and Funkie! This time Cec is our lovely hostess and she has chosen the theme MONOCHROMATIC. She would like you to create a shabby chic or vintage style project using only one colour and it's various hues. A little white for accenting is alright, but NO other neutrals are allowed! One lucky winner will receive a $25 gift certificate to Linda's shop The Funkie Junkie Boutique!


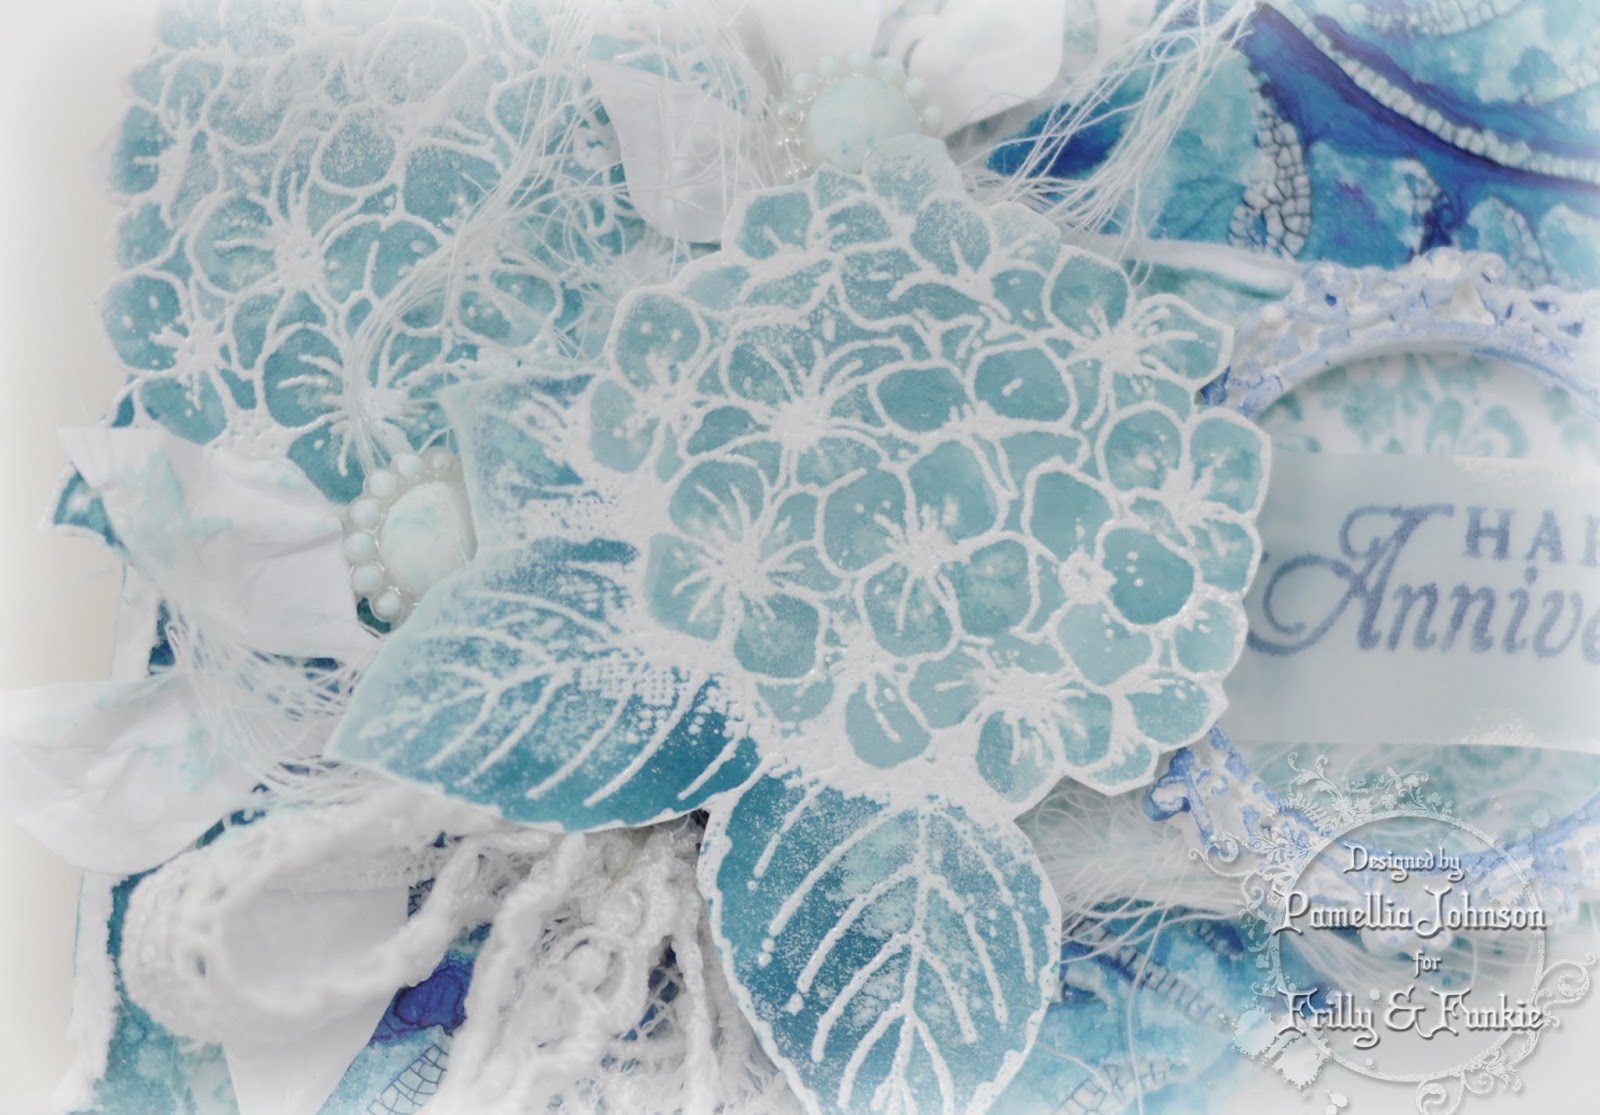
I decided to do an anniversary card for my niece who was married on a beach in Jamaica last year. I thought a nice blue card with some Summer Waves would maybe take her back to that day, just for a minute or two. I actually ordered some pretty white sand dollar shells, but they didn't arrive in time to add them before I had to take the photos. I will put them on before mailing the card though. 


My background was done using one of the new Ken Oliver colours that are now available in Linda's shop. This one is called Ultramarine. I laid down some Wendy Vecchi crackle paste through her Flourish stencil which I think looks like waves, and then dusted with Ranger fine detail embossing powder before adding the colour.


For the deep blue layer, I spritzed a panel with distress ink Mermaid Lagoon and then splashed on a little water to get the drips and drops. The circles were made with the caps of my Mini-mister and Distress Ink Spray bottles. For the light coloured layer, I stamped the Tim Holtz script stamp from the Papillon set using Tumbled Glass, then I dripped some of the ink spray around the edges to make it look like water.


The flowers stamps are Wendy Vecchi. I white embossed them and then coloured with Tumbled Glass and Mermaid Lagoon. The tag is Tim Holtz. I stamped it with the Distress Damask set in Tumbled Glass. The sentiment is from the Graphic 45 Time to Flourish stamp set. I stamped it using Archival Ink Cobalt Blue.


The doily is from Prima. The gorgeous lace, the hidden white pearls and the bronze embellishment are all from Linda's shop. The small pearls and the bronze embellishment were coloured using Ranger Alcohol inks Stream, Sailboat Blue and Indigo. The leaves were cut from Sizzix Garden Greens.The frame was made with crafter's clay and lightly painted with Salty Ocean paint.


All of the following products that I used can be purchased at The Funkie Junkie Boutique


That's it for today. Thank you for stopping in and for all the amazing comments. I read and appreciate every single one! If you have any questions, please let me know.


Monday, June 1, 2015

Crafty Cardmakers and More #140 - Stitching

Hello Everyone!

I do hope you all had a wonderful weekend. I had the most interesting lunch on Saturday. I thought I would cook up a nice vegetable stir fry with a bit of chicken, so I cut everything up and threw it together in a pan. I added a packet of chicken broth for a nice light flavour. Turned out is wasn't chicken broth at all, but in fact I had added a packet of Crystal Lite Pink Lemonade mix instead!! SO GROSS!! Bologna sandwich, here I come! HAHA!

Well, it's time for another challenge over at Crafty Cardmakers and More! This time around our lovely hostess Sue has chosen the theme STITCHING, so she would like to see real or faux stitching on your project.


I have been playing a lot with this new Ecoline product, so for this card I decided to switch up the substrate and used a clear gesso for the base. It did not work very well, the Ecoline didn't blend very well with the Gathered Twigs distress stain, so I ended up with kind of a mish-mash of colours. I figured, what the heck and rolled with it!!  The stencil is from Wendy Vecchi.


I added some Ranger Rock Candy Crackle paint here and there for some added texture. I rubbed a little DecoArt paint in the cracks to accent them. The corner piece was a dark pewter, so I added some white paint and a little Krylon silver leafing to brighten it up, ditto for the button.


The flowers are my usual Joy Crafts die cuts with a touch of Salty Ocean and Gathered Twigs distress inks. The leaves are from Prima.


The tag is from Tim Holtz. I stamped it with my favourite LaBlanche flower stamp and coloured it with the Ecoline inks. I think I need to find a new favourite flower stamp, this one is getting beaten to death! HA!


That's it for today. Thank you for stopping in and for all the amazing comments. I read and appreciate every single one! If you have any questions, please let me know.