Wednesday, August 6, 2014

Happy Birthday - Mellow Yellow

Hello Everyone!

I'm back with another first for me today...yellow! Isn't is spectacular! I was really inspired by some challenges to try something new and I was surprised with the results. I will tell you all about the challenges in a minute, but first, here is my card full of sunshine! I hope you enjoy!


I would like to send out a special Thank You and a huge hug to the wonderful and very talented design team members over at Tuesday Throwdown for choosing my Vintage Christmas Ornament as one of their top 3 in their 'Other Than a Card or Tag' challenge. I am really honoured and will display their badge with pride. You can click on the images for more details on the challenge and/or my ornament.

This week at Tuesday Throwdown is Challenge #207 - Mellow Yellow. I have never made a yellow card before, but I was completely inspired by the DT creations and decided to give it go!


I'm really excited to play along this week with such a talented group of artists over at Just Us Girls Challenge! I was so sad to miss last week, but I'm back in the game for this week's Challenge #252 - Ribbon.

I used lots of curly ribbon on my card and I even stuck some ribbon in between the shabby layers! How fun is that!! This is one of my favourite ribbons, but it doesn't go with everything, so I don't get to use it as often as I like. I thought this was the perfect card and the perfect challenge for me to be able to use tons and tons of it!


WOW Embossing Powder Technique:

For the top background layer, I have a little technique that might interest you. I just love using the emboss resist technique, but embossing powder is shiny and I find that I don't really enjoy that look on a shabby chic card. WOW carries a dull embossing powder, but it's not available at any of my craft stores, so here is my little trick.

I emboss my pattern using WOW Clear Gloss embossing powder, then I apply my ink...in this case it was Technique Tuesday - Lots of  Dots with Tim Holtz distress ink Squeezed Lemonade. And here is the trick part...after you are all done with your inking, take your heat gun and warm the embossing back up - then, while it's still hot, take a soft cloth and rub over the top of it. Takes the shine right off!!!

This week I'm entering my card into the WOW Embossing Challenge Blog, for their August Challenge - Monochrome.


Dies: Cheery Lynn Designs-french pastry doily & branch set, Joy Crafts-flourish branch 1 & flowers 4, Memory Box-whimsy circle
Stamps: Technique Tuesday-lots of dots, Impression Obsession-vintage rose spray, Kaisercraft-heirloom, Heartfelt Creations-all seasons sentiments
Handmade: both yellow backgrounds, all the light yellow flowers and the pebble
From My Stash: stamens and that fabulous polka dot ribbon


I am honoured to also enter my card into the following new challenges! I'm really excited to play along with them for the first time!

Seize the Birthday - Seeing Yellow Birthdays (monochromatic yellow)
Scrap Gang - Challenge #75 - Sunny
Chocolate, Coffee & Cards - Challenge #70 - Polka Dots
Dies R Us Challenge Blog - Challenge #7 - Birthday


That's it for today. Thank you for stopping in and for all the amazing comments. I read and appreciate every single one! If you have any questions, please let me know.


Monday, August 4, 2014

A Little Birdie Told Me - Mixed Media Card

Hello Everyone.

I hope you had a great weekend! Today I want to share with you my second attempt at a true mixed media card. Here's a quick overall shot, then I will tell you about the card.


First I would like to send out a big hug and many thanks to all of the amazing design team members over at The Mixed Media Challenge Blog for choosing my very first mixed media card - Birthday Wishes as a highlight in their very first mixed media challenge - Touch of Nature. There were so many amazing projects entered, I cannot begin to tell you how honoured I am to display their badge. If you click on their badge, you can see all of the other beautiful projects that were highlighted, as well as the winning project by Luli.


This month, their challenge is Challenge #2 - Summer. They asked us to do something that reminds us of summer and the first thing that came to mind is my Mom's wonderful patio garden filled with birds. So, that is what I went with! They also gave us an option to include some burlap. My intention was to line all the layers of my card with burlap, but when I put the first piece on, I just found it to be too harsh against my soft pastels, so I opted for layers of white crinoline instead.


There are lots of photos because I wanted to capture all of the little details that I included. Here we go!


How I did the background:

I covered my paper with a layer of home-made texture paste and made sure to make it smudgy and smooshy (yes, those are words). I globbed it on real thick in some spots so I could press some seed beads into it here and there. I also pressed some bits of cheesecloth into the paste, then I let it dry.

Then came the DecoArt Paints. Many layers of Crafter's Acrylics and Americana Arylic paints in Early Spring Green, Cherry Blossom, Daffodil Yellow and Flesh until I got the look I wanted. Then I added some Ranger White Studio Gesso here and there to put a bit of grit on it. Next, I made some sprays using Tim Holtz distress stains Gathered Twigs and Spiced Marmalade by mixing them with water in mini misters. Gave some squirts over the beaded areas and let it drip down the page. I also used my blending tool to add some distress ink Spiced Marmalade, Crushed Olive and Shabby Shutters, just to highlight the green and peach paints. Then I used my paint brush to flick some Gathered Twigs, Spiced Marmalade, Worn Lipstick and Peeled Paint in random spots.

I stamped some images and designs using Ranger Archival ink Coffee and then took a sponge with some white paint and highlighted all of the raised areas. Lastly, to add a bit more interest, I put some home-made crackle paint here and there around the birds.


The birdhouse was done using Poppystamps - Carolina Birdhouse die and home-made crackle paint. The bird was handmade using polymer clay and a Mod Melt mold and then textured with Ranger Picket Fence crackle paint. I painted her with some Spiced Marmalade, Shabby Shutters and Gathered Twigs.

The ribbon was coloured with Spiced Marmalade, Squeezed Lemonade and Shabby Shutters. The birds stamps are from the Prima Songbird collection.


The green panel was stamped using Tim Holtz Fabulous Flourishes and then stencilled with Crafter's Workshop Reverse Chicken Wire. I highlighted the chicken wire by rubbing the Spiced Marmalade ink pad directly over the paste.

I wrote this sentiment because I thought it was perfect for a card with birds all over it. It was done by hand using a Studio G wood mounted miniature alphabet stamp set...cutsie right!!


I am thrilled to also enter my card into the following challenges:

ABC Challenges - Q is for Quote
Country View Challenges - Word Play
Sweet 7 Designs Challenge Blog - Challenge #1 - Birthdays
Suzy Bee's Bloomin' Challenge Blog - #40 - Anything Goes
Make My Monday - Birds

I already entered a card for this next challenge, but my birdie sentiment seems to fit so nicely, I just couldn't resist:
Fussy and Fancy - Challenge #119 - Words


That's it for today. Thank you for stopping in and for all the amazing comments. I read and appreciate every single one! If you have any questions, please let me know.


Saturday, August 2, 2014

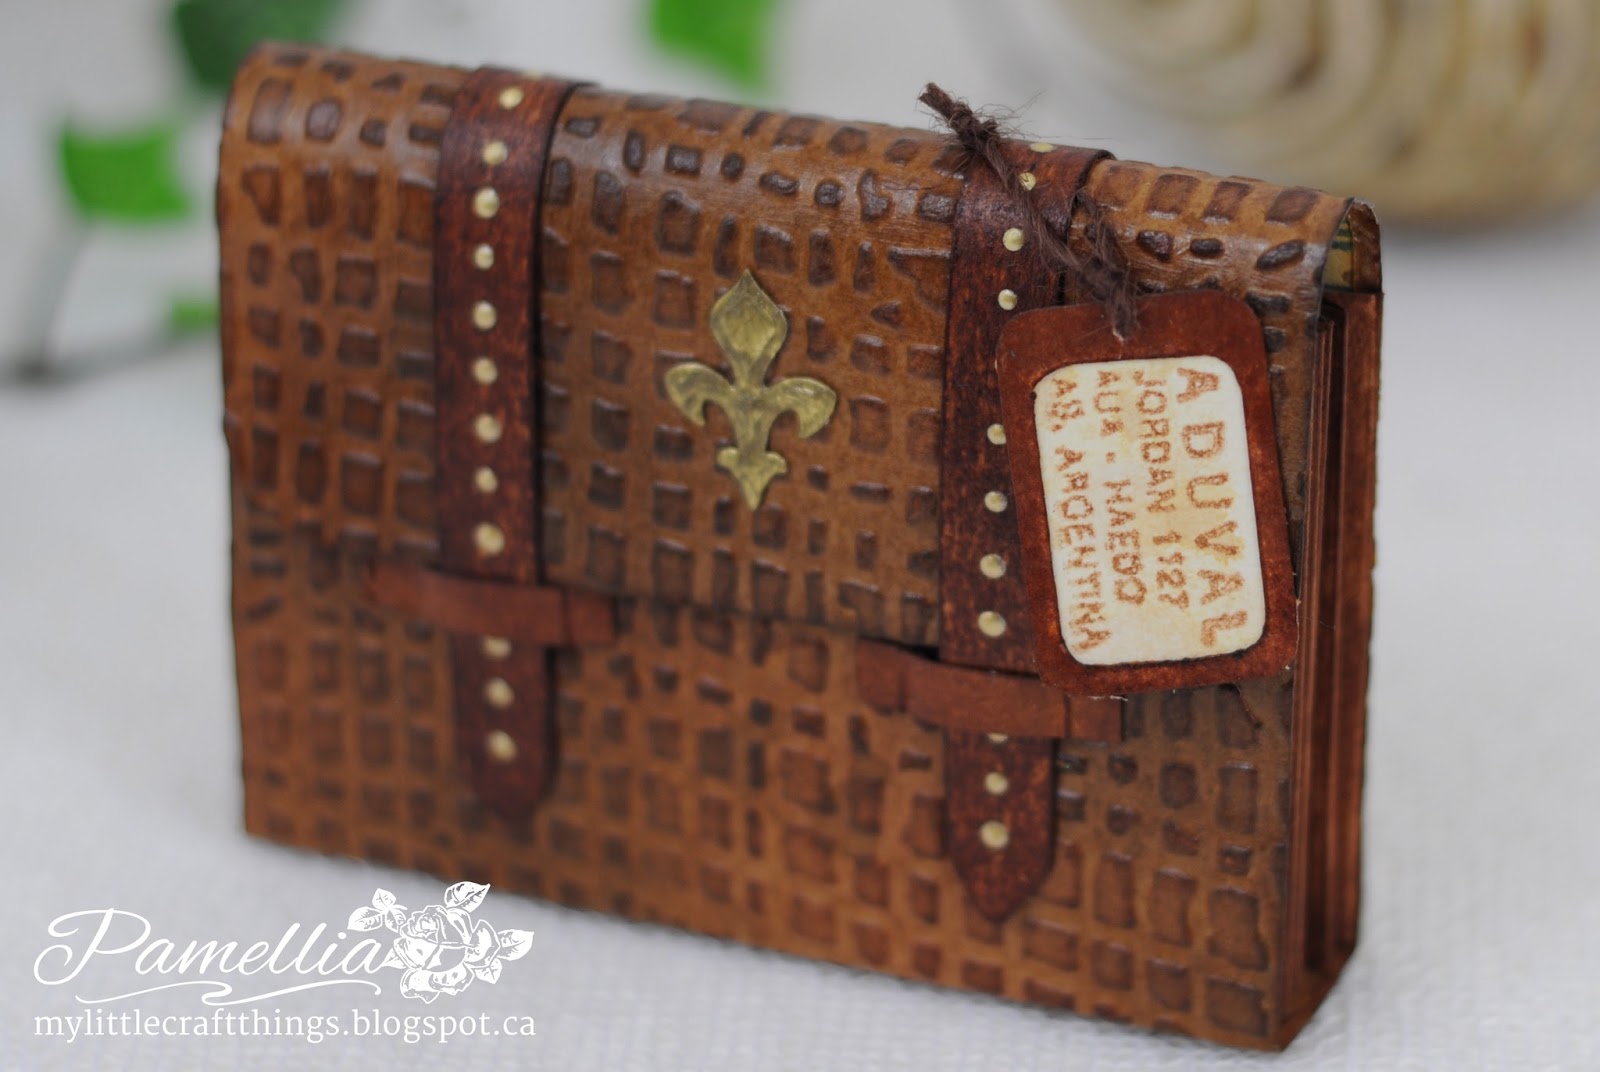
Vintage Travel Bag - My Summer Journey

Hello Everyone!

I'm back today with something completely new and different for me...a project just for the heck of it! Usually when I make a card or project, I have a use in mind...somebody's birthday, anniversary etc. This time, I really just wanted to do something with my Tim Holtz products that I'd never done before!

I was really inspired by some amazing artists at a couple of challenge blogs that I just love, and their most recent challenges really put my mind to work and put my skills to the test! I hope everyone will take a minute and visit both of them:

A Vintage Journey - Challenge #11 - Just Stain It and Frilly and Funkie - Vintage Travel Challenge

I've been anxious to try a technique that I just learned using Tim Holtz distress stains, so I pulled out some scrap pieces of paper and got to work. I spread some distress stain Gathered Twigs on my kraft sheet, then spritzed some water with my mini-mister and just for good measure, I flicked a little Vintage Photo with the end of my brush. I took my scrap bits of paper and swiped and dabbed and smooshed until they looked a million years old!! Oh the joy!

I included a couple of Tim Holtz products in the photograph so you can see how teeny tiny this bag is. Isn't miniature fun!  I hope you enjoy!!


The outside of the travel bag was embossed using the Sizzix Burlap embossing folder and coloured with Tim Holtz distress stain Walnut, as well as distress inks Brushed Corduroy and Vintage Photo. The straps are decorated with Ranger gold liquid pearls. The little fleur-de-lis was cut from Spellbinders Damask Motifs and antiqued using gold and green paints and Black Soot distress stain. Isn't it cutsie!


The lining for the bag was stamped using a Hero Arts plaid stamp with Ranger Archival ink Cornflower Blue and then distressed by flicking some Gathered Twigs distress stain with the end of my brush. As well, there is a coffee stain using a BoBunny texture stamp and Vintage Photo distress ink.


Memories from my trip include:
- a postcard from Paris
- a postcard from the Bahamas
- a postcard from London
- a postcard from Argentina
- a ticket stub
- a map
- a souvenir statue of the Eiffel Tower

OK, so not really, but isn't it super fun to pretend that you're 18 inches tall and this is really yours!!


All of the papers were stamped with Tim Holtz distress ink Vintage Photo and the edges were distressed with my Tim Holtz distresser tool. I coloured the edges by rubbing them directly against the Vintage Photo ink pad, it really gave them an aged look! All blobs and smudges are intentional! HA!


How cool is this map!! It was done using Impression Obsession's cover-a-card map. I stamped it using Vintage Photo then I crumpled it up and highlighted the folds and wrinkles with my blending tool.


I am also entering my Vintage Travel Bag into the following challenges. These are all absolutely wonderful challenge blogs that I'm honoured to be a part of!!

Card Mania - Challenge #52 - Vacation or Travel
Simon Monday Challenge Blog - J is For...(I chose Journey)
Alphabet Challenge Blog - M for Men Only
C.R.A.F.T Challenge - #270 - Wish You Were Here
Cardz 4 Guyz - Challenge #29 - Anything but a Card
Simply Create Too - Challenge #67 - Old/Vintage

That's it for today. Thank you for stopping in and for all the amazing comments. I read and appreciate every single one!  If you have any questions, please let me know.