Sunday, February 15, 2015

Tim's 12 Tags of 2015 - February

Hello Everyone,

It's take to take another run at Tim's tag event!! Here is my make for Tim's 12 Tags of 2015 - February


Last month I tried to make mine look as close to his as possible, this month I put on my brave face and tackled his tag with a bit more of my own style. I still used Tim Holtz's products and followed all his techniques, but there's a bit of Pam in there as well! lol


Here are some in-progress shots and a list of products used:

Tim Holtz Bigz die Love Struck
Tim Holtz stamp set Curious Possibility - Tim Holtz stamp set Urban Grunge
Tim Holtz stamp set Flights of Fancy - Tim Holtz stamp set Life's Possibilities
Tim Holtz distress inks Black Soot and Festive Berries
Tim Holtz distress sprays Festive Berries and Fired Brick (for the ribbon) Pumice Stone (for the background)
Tim Holtz distress paint Brushed Pewter and Black Soot
Tim Holtz distress glitter Brushed Pewter - Tim Holtz crackle paint Rock Candy
Ranger Glossy Accents and Ranger Platinum embossing powder


I am entering the following wonderful challenges:


That's it for today. Thank you for stopping in and for all the amazing comments. I read and appreciate every single one! If you have any questions, please let me know.


Friday, February 13, 2015

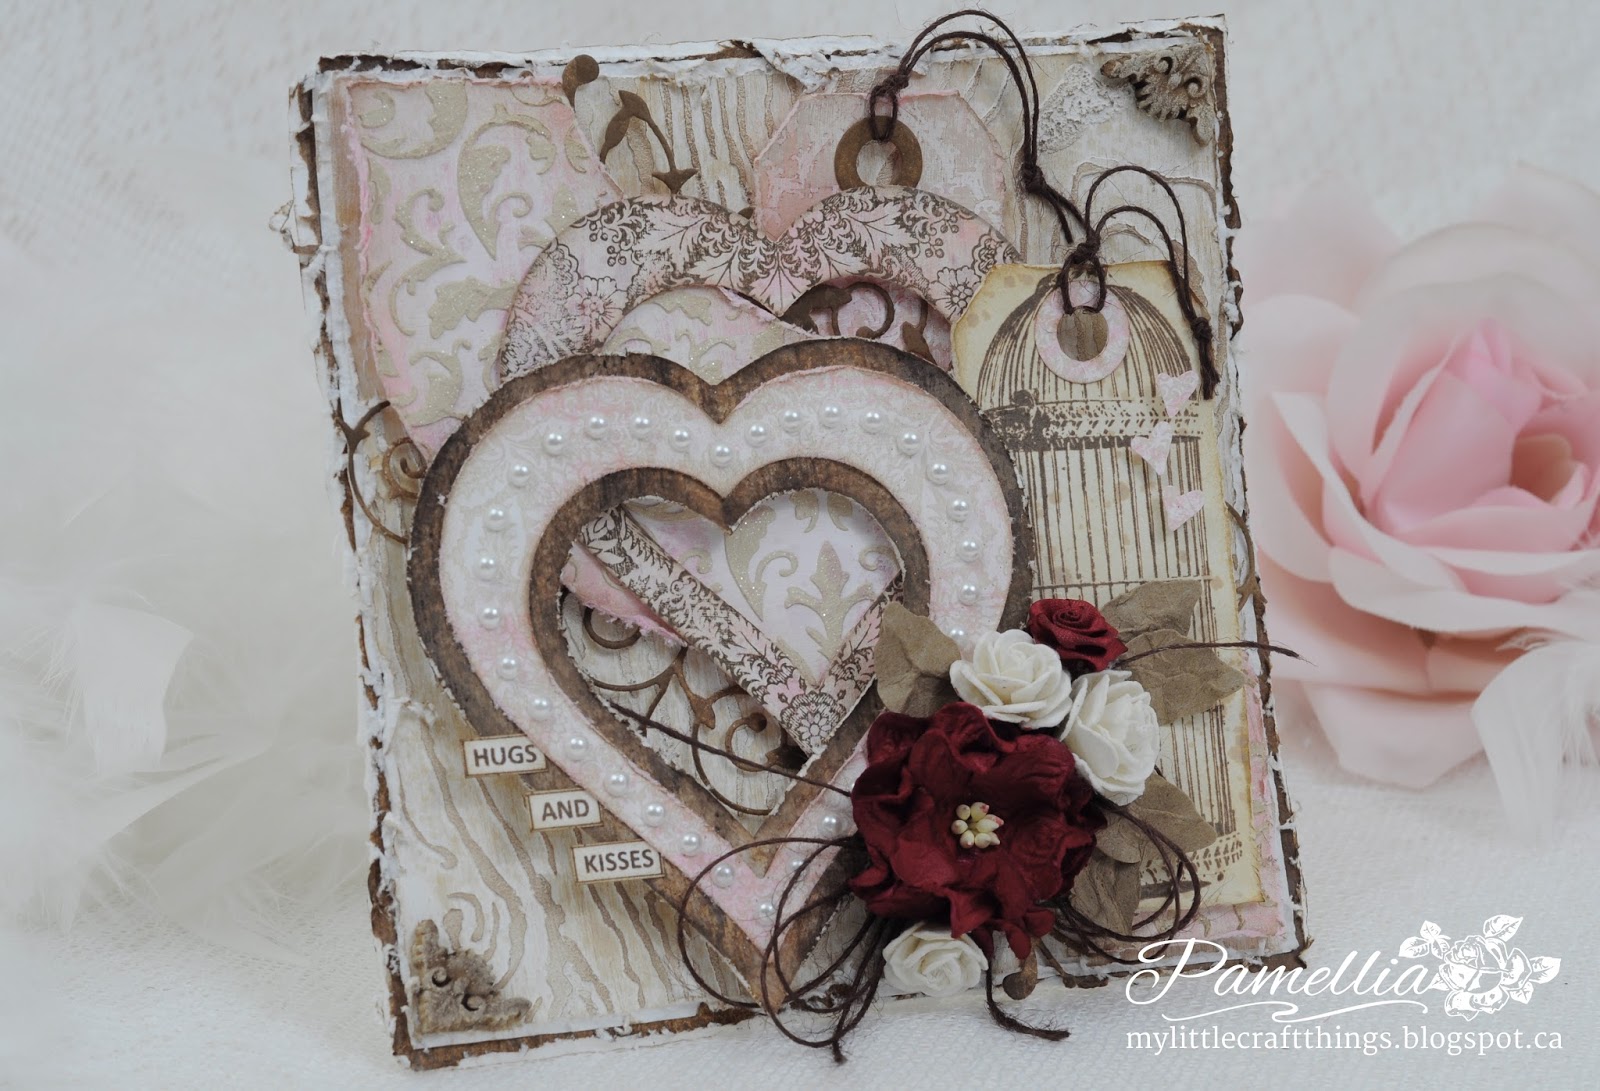
Hugs and Kisses

Hello Everyone!

Today my card is just for fun! I really wanted to do something with with my new Tim Holtz paints, sprays and stains that just arrived from The Funkie Junkie Boutique and some of my favourite Tim Holtz techniques, so this is what I put together. I realize my card doesn't look very Tim Holtz-ish, but his ink products can be used to create any style of card, it's all in how you use them!


For the background layer, I used Tim's paint marbling technique (page 43-vol 3). I used Picket Fence and Antique Linen distress paints and then I used a Crafter's Workshop Woodgrain stencil with some home made texture paste (coloured with DecoArt Tan acrylic paint) to add the pattern. After the paste dried, I lightly swiped it with some Gathered Twigs ink using my blending tool.

The flourish die behind the hearts is Honeysuckle vine from Memory Box which I coloured with Gathered Twigs distress stain. The sentiment is from Heartfelt Creations - stamped with Ranger Archival ink Coffee. The corner piece was made with crafter's clay and a silicone mold and coloured with Gathered Twigs stain and DecoArt Crafter's Acrylic White paint.


In keeping with my New Year's resolution, I have pulled out a Spellbinders border die called A2 Curved Borders to cut the shaped panel behind the hearts. I painted it white and then streaked it with my brand new Tim Holtz Spun Sugar and Victorian Velvet distress stains. I used Crafter's Workshop Damask Flourish stencil with some beige home-made texture paste and then covered it with some Rock Candy distress glitter while it was wet.

The hearts were cut using a Go Kreate set. The bottom heart was painted white, streaked with Spun Sugar and Victorian Velvet stains, spritzed it with Picket Fence spray and then stamped with a Rubbernecker Damask Flourish stamp using Coffee ink. The top heart has two layers, the bottom I created a woodgrain effect using a combination of distress inks, sprays and paints. The top heart was made using a variation of Tim's paint resist technique (page 47-vol 3).


I'm ashamed to say that the flowers are NOT hand made, I did dye them myself though. I used Tim Holtz Fired Brick and Aged Mahogany sprays to get the desired rich red I wanted, I just dipped a small brush directly into the bottle for the perfect application (OK, almost perfect, I did get a little on the stamens. lol). The leaves are from Spellbinders Foliage set.


The tags were cut with Tim Holtz Tiny Tabs and Tag. One was stamped using a Kaisercraft Birdcage stamp and the other was stamped with Spun Sugar and the Rubbernecker Damask stamp and spritzed with some Worn Lipstick spray for contrast. Both tags were edged using Gathered Twigs. The teeny tiny hearts were cut out using a punch and popped up on pop dots.

After the card was finished, I took some Antique Linen and Gathered Twigs distress sprays and flicked a little bit here and there with my brush to get some drops and drips.


I am entering my Hugs and Kisses card into the following wonderful challenges:


That's it for today. Thank you for stopping in and for all the amazing comments. I read and appreciate every single one! If you have any questions, please let me know.


Wednesday, February 11, 2015

Frilly and Funkie - Winter Blooms

Hello Everyone!

It's time for another fun challenge over at Frilly and Funkie! Thank you so much to everyone who played along with me for the Valen-Twine challenge! I was just drooling over all of the romantic, shabby and vintage projects that you made! You made it really difficult to pick a favourite!

This time Sue is our lovely hostess and she has chosen the theme WINTER BLOOMS. Even though it's the middle of winter, she would like you to take this opportunity to create our own flowers! So, whether you make roses or paper daisies, let's see lots of handmade flowers on your project! Here is my make.


Since it is still winter time where I am, I thought I would do something a little different with my flowers. Something a little darker in colour and deeper in dimension. All three flowers are made using the Tim Holtz Tattered Florals die. I used the script stamp from the Tim Holtz Papillon stamp set to add a design to the petals. I used Ranger Archival Potting Soil and Cobalt for the neutral petals and Ranger Adirondack Snow Cap for the blue petals.


The leaf flourishes were cut using Tim Holtz Garden Greens. I dabbed all of the leaves with some Picket Fence distress paint so I would have some areas to stamp on. The beautiful doily die is from Prima. The button and blue pins are from my stash.


For the background, I stamped a Hessian design from Kaisercraft onto kraft paper and then used some White Gesso to cover some of the areas. I tinted some home-made texture paste using Wendy Vecchi inks, a mix of Forget-me-Not and Sky Blue re-inkers and then applied it through the Tim Holtz Gothic stencil.

The beautiful flower corner piece is from Linda's shop, The Funkie Junkie. It's bronze, so I used a little Adirondack Alcohol ink Snow Cap to shabby it up a bit and make it look antique.


In keeping with my New Years resolution, I pulled out a never-before-used Spellbinders die from the Noble Rectangles set to make the base for my butterflies. I stamped the script stamp with Brushed Corduroy, then edged it with Gathered Twigs. I flicked a bit of water and a bit of Picket Fence with the end of my brush.

I stamped the butterflies once directly on the base using Cobalt and then again on scrap paper and fussy cut them out. I did a bit of highlighting with a white pen and then attached with my Tiny Attacher from Tim Holtz.


This gorgeous lace is also from Linda's shop! Isn't it just absolutely luscious!! Did everyone notice my beautiful new watermark?? Designed by Linda herself, I just love it!!


I am entering my Winter Blooms card into the following wonderful challenges:
***

All of the following products that I used can be purchased at The Funkie Junkie Boutique


COMMENTING UPDATE:

I would just like everyone to know how much I appreciate everyone who takes the time to visit and leave a comment! Up to now I have always tried to say thank you to everyone, because I wanted to make sure you know how grateful I am. Unfortunately, I mow find that I am having a hard time keeping up with so many wonderful comments, so I am going to have to limit my responses to answering questions.

I hope everyone understands and I hope you realize that I still read and appreciate every single comment...and please feel free to continue to ask your questions. I will always take time out for answers. Thanks again to everyone for your support and I send big hugs out to all of you.